Master the Hanging Knee Raise to Build Core Strength and Avoid Common Mistakes
If your core training is still limited to floor exercises, you might be missing out on significant strength gains. While moves like Pallof presses, planks, and bird dogs are foundational, it’s time to elevate your workout. Enter the Hanging Knee Raise.
The Hanging Knee Raise is not just a test of your core strength; it challenges your control and overall toughness. As you hang from a bar and resist swinging, you engage your anterior core, grip, and lats, creating a full-body workout that’s anything but easy.
The good news? This exercise sets the stage for heavier lifts, promotes better posture, and helps define the midsection that many strive for. It’s time to elevate your core workout from the floor to new heights. Are you ready for the challenge?
Understanding the Hanging Knee Raise
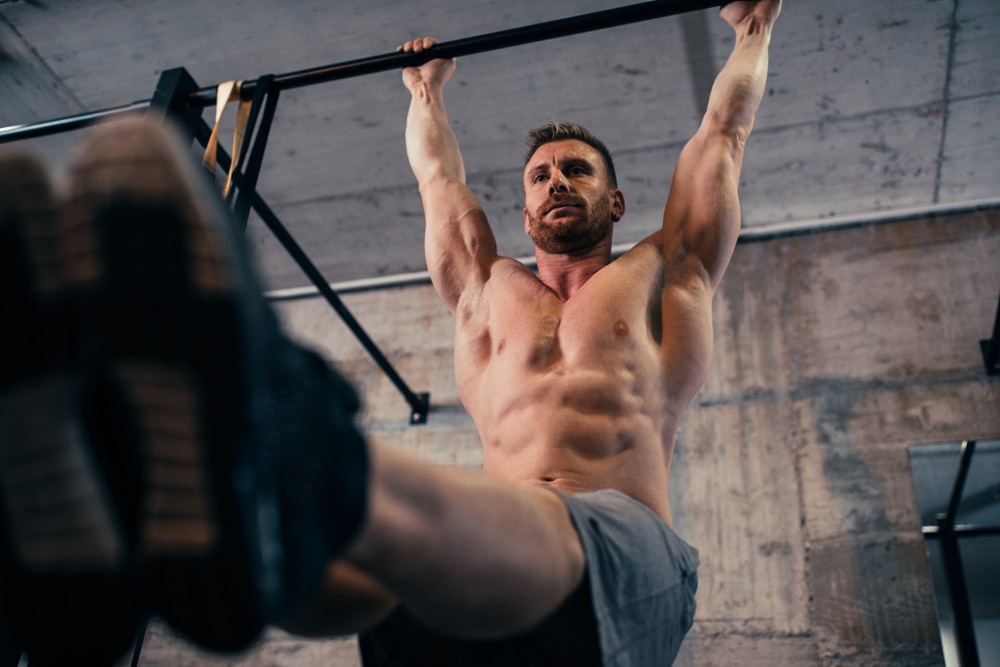
The Hanging Knee Raise is an exercise that requires you to raise your knees to your chest while suspended from a pull-up bar. However, this movement engages much more than just your abs. As your anterior core stabilizes, your grip, shoulders, and lats are called into action to maintain your posture.
This exercise emphasizes both spinal flexion and hip flexion, and with the added challenge of resisting momentum, it stands as one of the most comprehensive core exercises available. It’s ideal for athletes, dedicated lifters, and those wanting to enhance their core regime.
Whether you’re training for strict pull-ups, looking to strengthen your midsection, or aiming for that athletic physique, the Hanging Knee Raise is a fantastic addition to your fitness arsenal.
How to Perform a Hanging Knee Raise
Mastering the Hanging Knee Raise requires focused, controlled movements. Follow these steps for optimal execution:
- Begin by gripping a pull-up bar with your hands slightly wider than shoulder-width.
- Engage your shoulder blades down and back as you brace your core.
- With your legs together, contract your abs and hip flexors to pull your knees toward your chest.
- Strive to elevate your knees to at least hip level while maintaining control.
- Gradually lower your legs back to the starting position without letting them drop or swing.
- Reset and repeat for the desired number of repetitions.
Muscles Engaged During the Hanging Knee Raise
Here’s a breakdown of the primary muscles at work during this exercise:
- Rectus Abdominis: Responsible for flexing the spine to lift your knees.
- Obliques: Help stabilize the upper body and prevent unwanted rotation.
- Hip Flexors: Assist in raising the knees toward the chest.
- Forearms and Hands: Vital for maintaining your grip on the bar and preventing slippage.
- Lats and Upper Back: Contribute isometrically to support your hang and minimize swinging.
- Serratus Anterior: Aids in stabilizing the scapula.
Benefits of the Hanging Knee Raise
Here are reasons why this exercise deserves a spot in your training regimen:
Creates a Comprehensive Core
The Hanging Knee Raise effectively targets spinal flexion and hip flexion, making it one of the most holistic core exercises available. Ideal for lifters, athletes, or anyone transitioning from traditional crunches to a more functional training approach.
Boosts Grip Endurance
Simply hanging challenges your grip strength, enhancing forearm endurance that translates to improved performance in pull-ups, deadlifts, and any activity requiring grip strength.
Enhances Body Control and Coordination
Controlling your body while your legs move engages your lats, abs, and shoulders, enhancing overall stability which is beneficial for compound lifts and more complex movements.
Strengthens Hip Flexor Power
In addition to aesthetic benefits, strong hip flexors are crucial for athletic performance in sprinting, jumping, and other explosive movements. The Hanging Knee Raise effectively targets these muscles, particularly under fatigue.
Whether you’re focused on building strength, enhancing aesthetics, or improving performance, the Hanging Knee Raise is a powerful exercise. Let’s discuss common mistakes to avoid for the best results.
Common Mistakes and Corrections for the Hanging Knee Raise
This movement may seem straightforward, but improper technique can lead to ineffective workouts and potential injury. Here are common pitfalls and how to correct them:
Using Momentum
Using momentum by swinging can undermine the exercise’s effectiveness. Your body will be less engaged, leading to diminished results.
The Fix: Initiate each repetition mindfully. If you find yourself swinging, take a step back. Focus on slowing down and resetting your core between reps.
Passive Shoulders
Allowing your shoulders to relax prevents effective muscle engagement, increasing strain on your joints.
The Fix: Activate your lats and upper back by pulling your shoulder blades down and away from your ears. This will provide stability and reduce stress on your shoulder joints.
Limited Range of Motion
Lifting your knees just a few inches fails to fully engage your core and hip flexors.
The Fix: Ensure you drive your knees as high as possible—aim for hip height or higher. Quality decreases quantity, so focus on form to maximize benefits.
Losing Control
An uncontrolled drop of your legs can stress your lower back and disengage your core.
The Fix: Maintain control throughout the lowering phase. Lower your legs slowly to maximize muscle engagement and protect your spine.
Programming Your Workouts with Hanging Knee Raises
Whether you’re a beginner or an advanced lifter looking to enhance your core routine, here’s how to effectively incorporate Hanging Knee Raises into your training:
Best Timing for Hanging Knee Raises
Add the Hanging Knee Raise into your warm-up or as part of your core circuit before engaging in heavier lifts. It’s also ideal to pair with lifting exercises that require less grip strength, such as bench or overhead presses.
Recommendations for Beginners
- Sets & Reps: Start with 2–3 sets of 6–8 reps.
- Tempo: Focus on controlled movements for both the ascent and descent.
- Rest: Allow 60–90 seconds of rest between sets.
Recommendations for Intermediate and Advanced Lifters
- Sets & Reps: Perform 3–4 sets of 10–12 reps.
- Tempo: Push slightly faster up, maintaining a 2–3 second eccentric phase.
- Rest: Take 90 seconds between sets for optimal recovery.
- Variations: Include a pause at the top of the movement, add a twist for oblique engagement, explore straight leg raises, or incorporate ankle weights for an extra challenge.


